![]() Facebook is a social networking platform originally created for college students to connect to each other, but once opened up to the public, the site has become the biggest social network on the web. It now has expanded further to cater to businesses and boasts over one billion users liking and commenting an average of 3.2 billion times per day.
Facebook is a social networking platform originally created for college students to connect to each other, but once opened up to the public, the site has become the biggest social network on the web. It now has expanded further to cater to businesses and boasts over one billion users liking and commenting an average of 3.2 billion times per day.
A business page on Facebook is very similar to the personal account you likely already have and includes profile pictures and cover photos, but is also very different in the categories available. Where the favorites on a personal page would appear is now replaced with promos and events for the business! The page you create will be a place to grow your business, build your brand and develop relationships with your customers.
Facebook is also a great tool to promote a blog/website you develop for the business on, as it allows you to network with people who share your interests and or know you personally if you invite them to like your business page. You can also create pages for your brand which represent themselves as separate entities which people can follow and receive updates from.
So let’s get started! This process takes about fifteen minutes and you will need: A business email address (at your domain or Gmail, Yahoo!, Hotmail, etc)
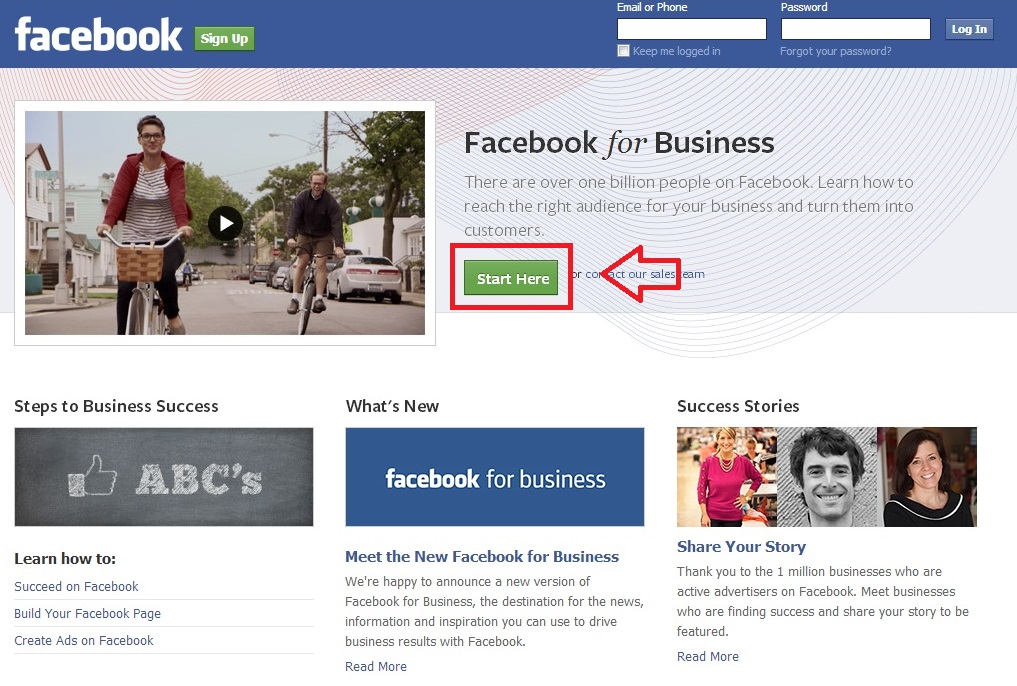
To create a business page on Facebook, navigate to the Facebook for Business page at https://www.facebook.com/business and select the green “Start Here” button in the middle of the page.
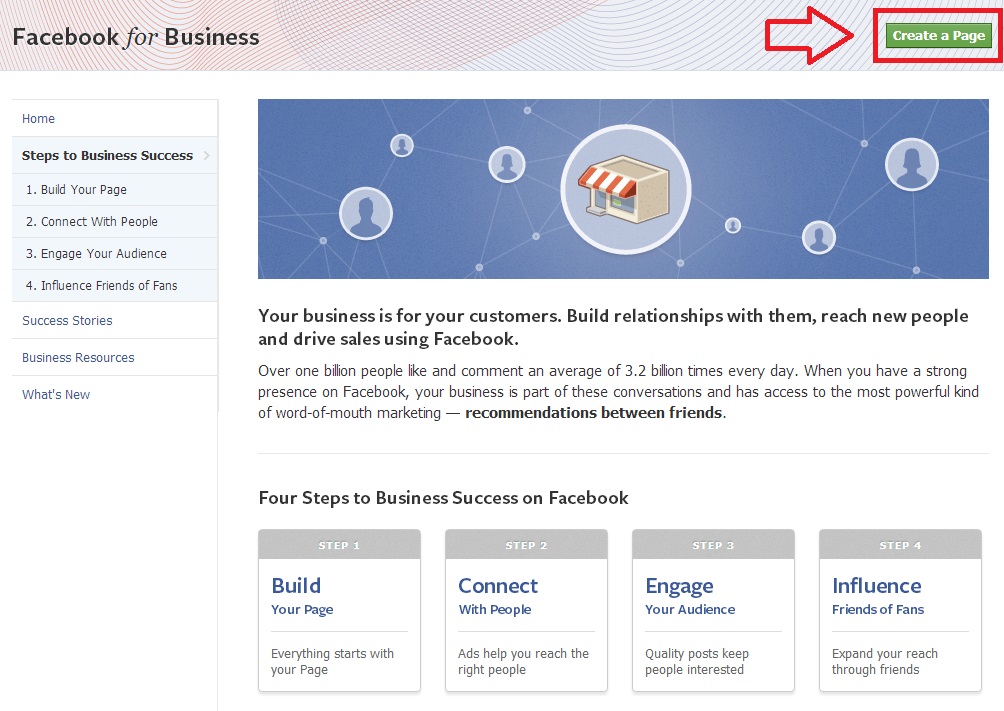
This page describes briefly the steps needed for business success on Facebook and has a green button that says “Create a Page” in the top right corner. Click on it to head to selecting a type of business page.
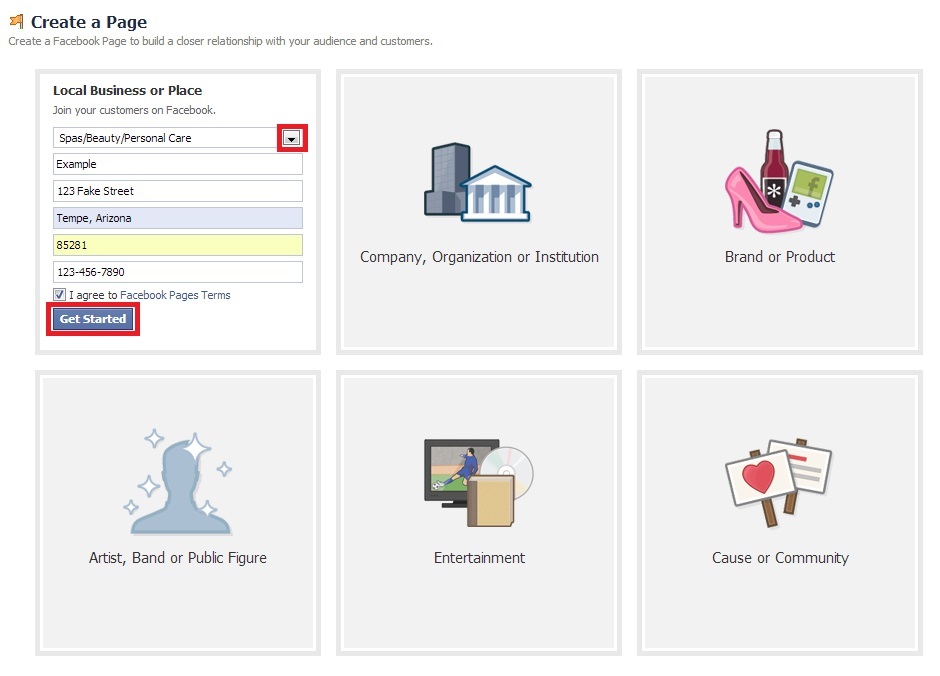
The type of page you’ll likely be creating is a “Local Business or Place” page. Select a category from the drop-down menu (Tip: Health/Medical/Pharmacy or Spas/Beauty/Personal Care may be a good fit) and fill out the form, check the box for Facebook Pages Terms and select “Get Started”
At this point, if you are not logged in to your existing Facebook account, it will ask you to log in or create a new account for the business. While you can use your personal Facebook account for this step, it is much more professional to create an account dedicated to your business. Be sure to use an email address that’s dedicated to your business! (See Business Email for more information and how to set one up if you haven’t already)
Once you’re signed up/logged in, Facebook will take you to the next step of setting up the page! The business in this tutorial is named “Example Business” for these purposes, but you’ll want to use your own business’ name.

Continue pressing next and following their steps, adding a profile picture, adding the page to your business’ Facebook account favorites so that it’s easily accessible (you can also add it as a favorite to your personal account) and reviewing their advertisement options (completely optional, click skip if you want to leave this for later on or not at all) and it will take you to the Admin Panel for Facebook, which should look like this:
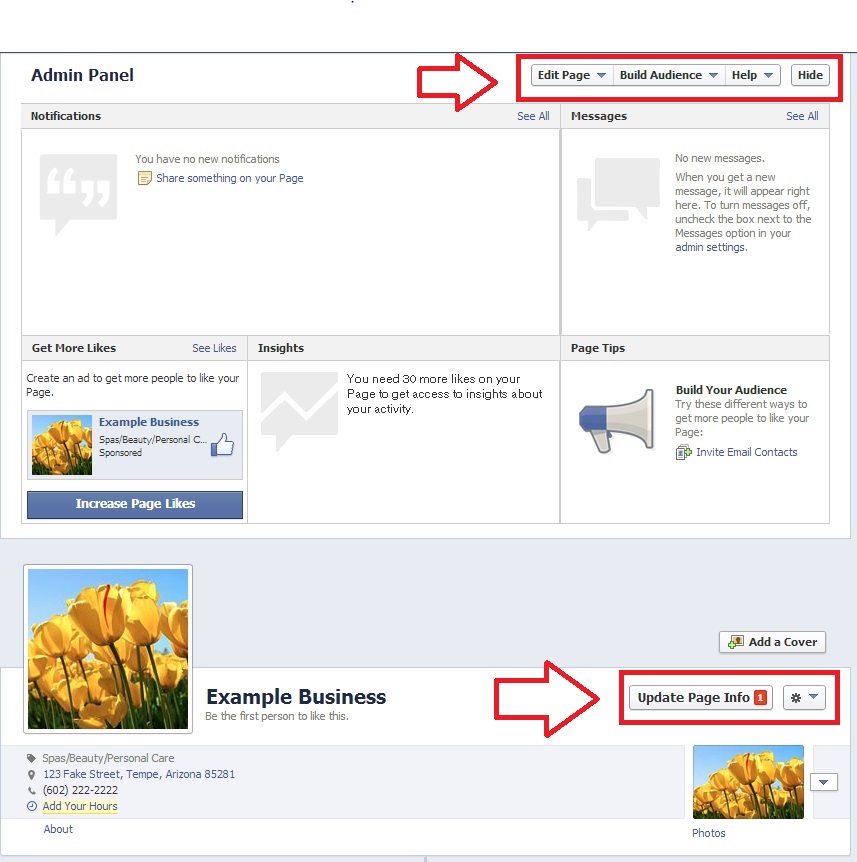
The items on the admin page that are going to be useful to starting out your page are building your audience (top outlined box) and updating your page info (bottom outlined box).
Selecting “Build Aud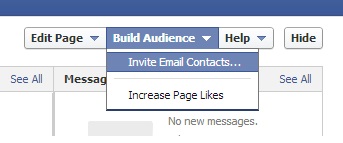 ience” gives you a drop-down menu with “Invite Email Contacts…” and “Increase Page Likes”. We’ll be focusing on the former as “Increase Page Likes” will take you to Facebook’s advertising budget tool.
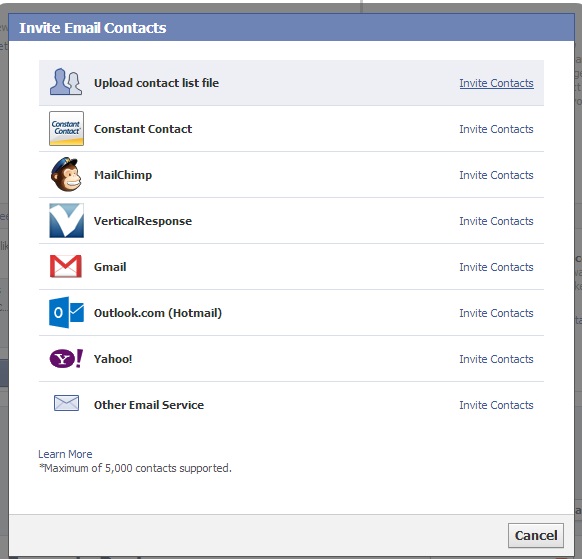
This interface to invite email contacts is designed for someone that already has a contacts list established and gives you many options for importing your list. Constant Contact, MailChimp and Vertical Response are all programs or companies designed to send out email blasts, promotions or surveys. The other options allow you to log in to your respective email account (personal or business) and import your contacts to invite them to like your business page. Don’t have any contacts in mind, but want to to invite all of your Facebook friends? No problem because in the next step we’re going to add your personal account as an administrator to make things easy for you!
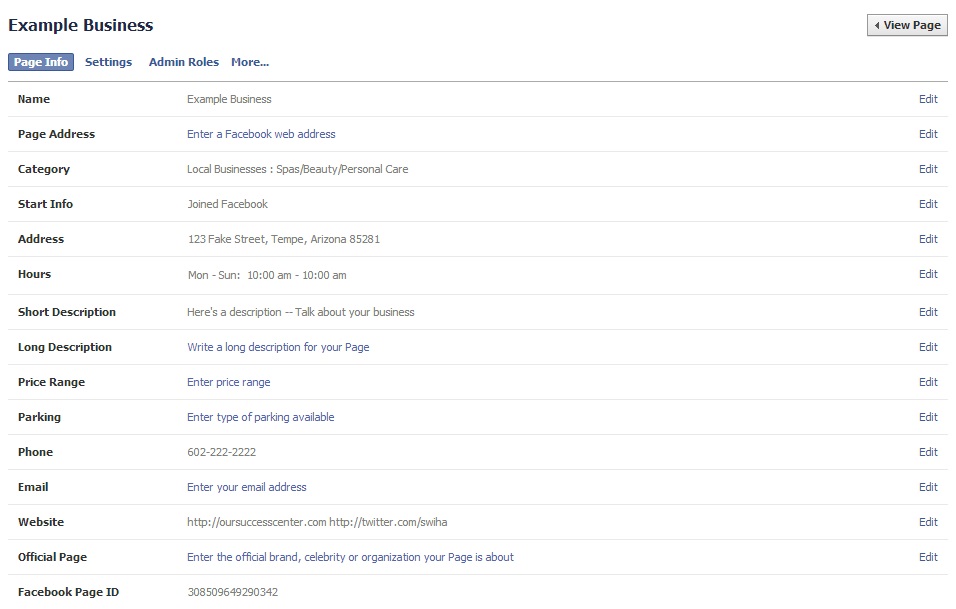
To add yourself as an administrator to your business page if you opted to set up a Facebook account for your business (which you should have done) and didn’t use your personal account to create this page, from the bar underneath the cover photo, select “Update Page Info”. This page is where you can update any of the information about your business including address, hours, description, price range and contact information.
Next across the top is the Settings page were you can edit page and post visibility, country and age restrictions and even a profanity filter among other things.
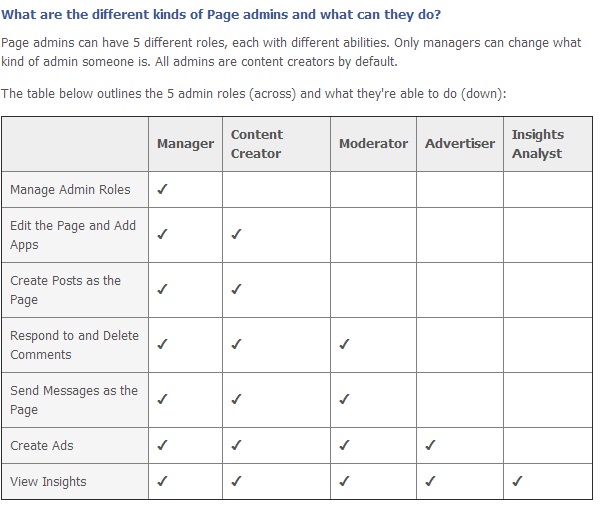
The page we want to be on is “Admin Roles” where we’ll be adding on your personal account (or anyone else that you would like) as an administrator. Facebook has a few different types of admins to choose from, all of which have different permissions depending on what you need them to be able to access and do.
Once you’ve selected the type of admin from the drop down menu, type in the name of a person that’s liked the page already or input the email address of the person you’d like to add as an admin, then select save. Note: If you would like to add more than one admin at a time, select “Add Another Admin” (underlined) and proceed as you did for the other admin.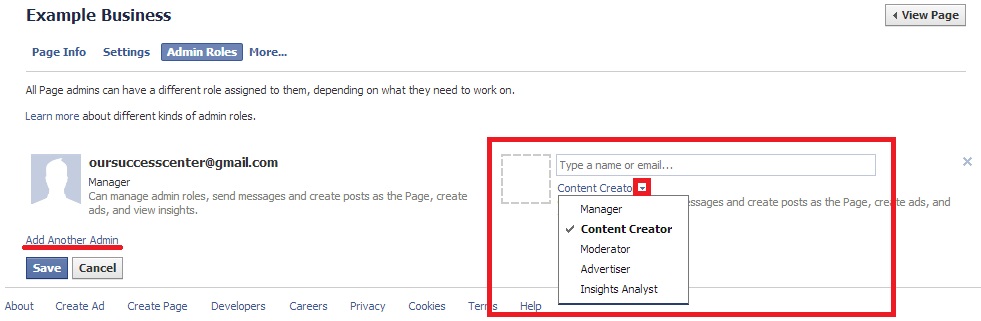
After this, all you need to do is promote your page, get more than 30 likes and you’ll be able to use Facebook’s measurements for anonymous demographics, see how people are discovering and then interacting and responding to your posts!
For additional information not covered here, please check out Facebook’s help section.
We make every attempt to ensure the accuracy of this information. If for any reason the information in this article in not correct, please contact OurSuccessCenter@swiha.edu with the article link and the information that needs to be updated.